|
 Important Important
 Warning Warning
- In case of low use replace il 12 months.
- To replace the cartridge with Option B filter, it is necessary to use the ST_55 tool cod. ED0014604590-S.
- For disposal of oil filter cartridge and fuel filter refer to Par. 6.5 DISPOSAL and SCRAPPING
- Procure a suitable container to collect the fuel.
- Rotate the filter A to take it to the unlocked position and remove it.
- Lubricate the gasket C.
Assemble the filter A on the support B and rotate it until reaches the lock position.
Important
- Do not fill the new cartridge A with fuel.
|
|
|
Option A
- Rotate the filter A to take it to the unlocked position and remove it.
- Lubricate the gasket C.
- Assemble the filter A on the support B and rotate it until reaches the lock position.
|
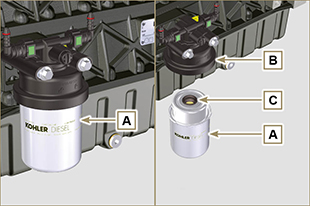
Fig 6.8
|
|
Option B
- Unscrew the ring nut H using the ST_55 tool and remove the cartridge A.
- Lubricate the gasket C of the new cartridge A.
- Insert the ring nut H on the new cartridge A and mount the new cartridge A on the support B.
- Tighten the ring nut H using the ST_55 tool (tightening torque 10 Nm).
|
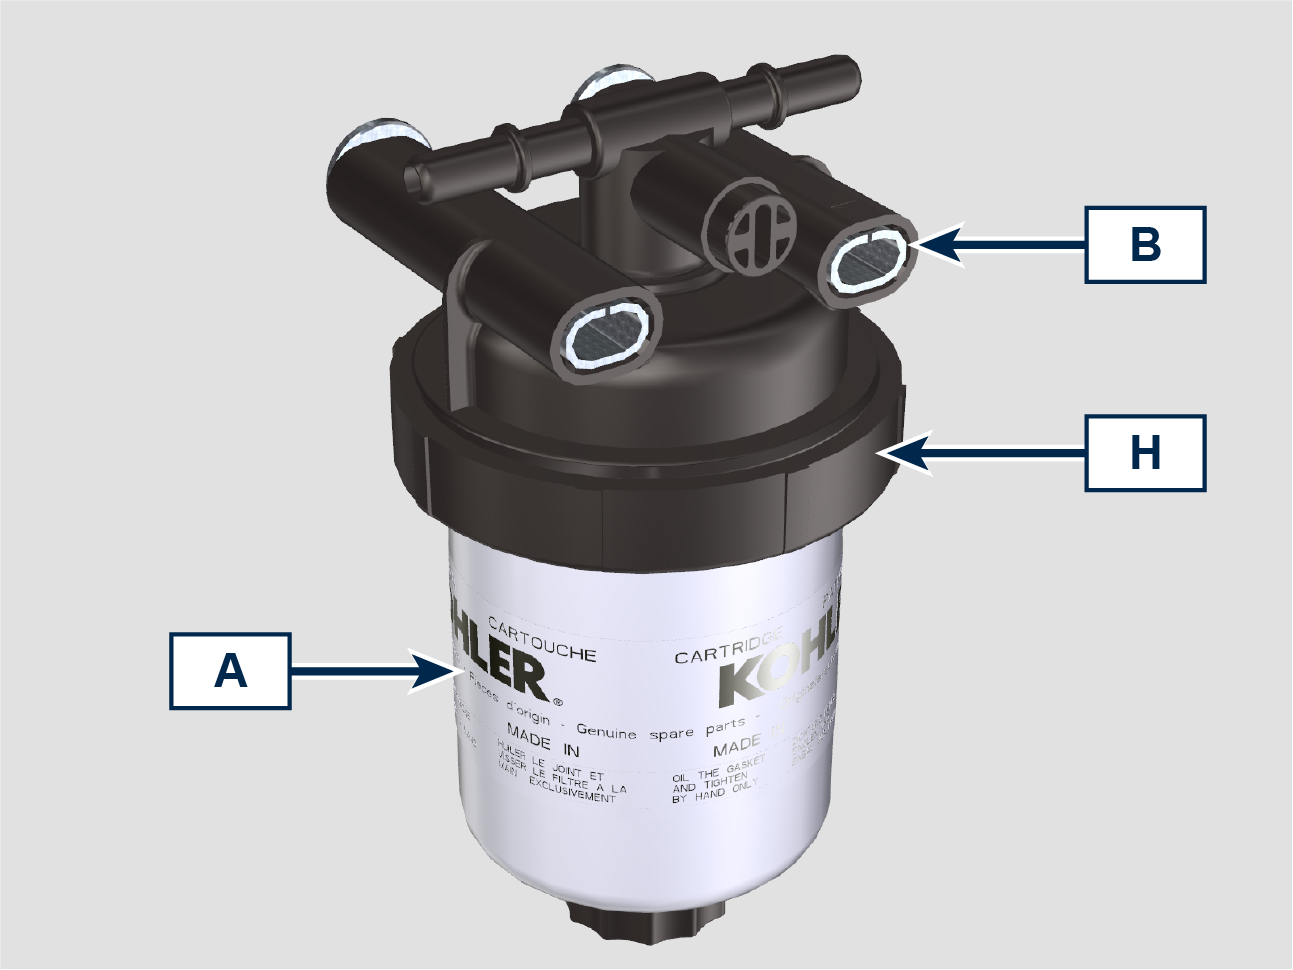
Fig 6.8a
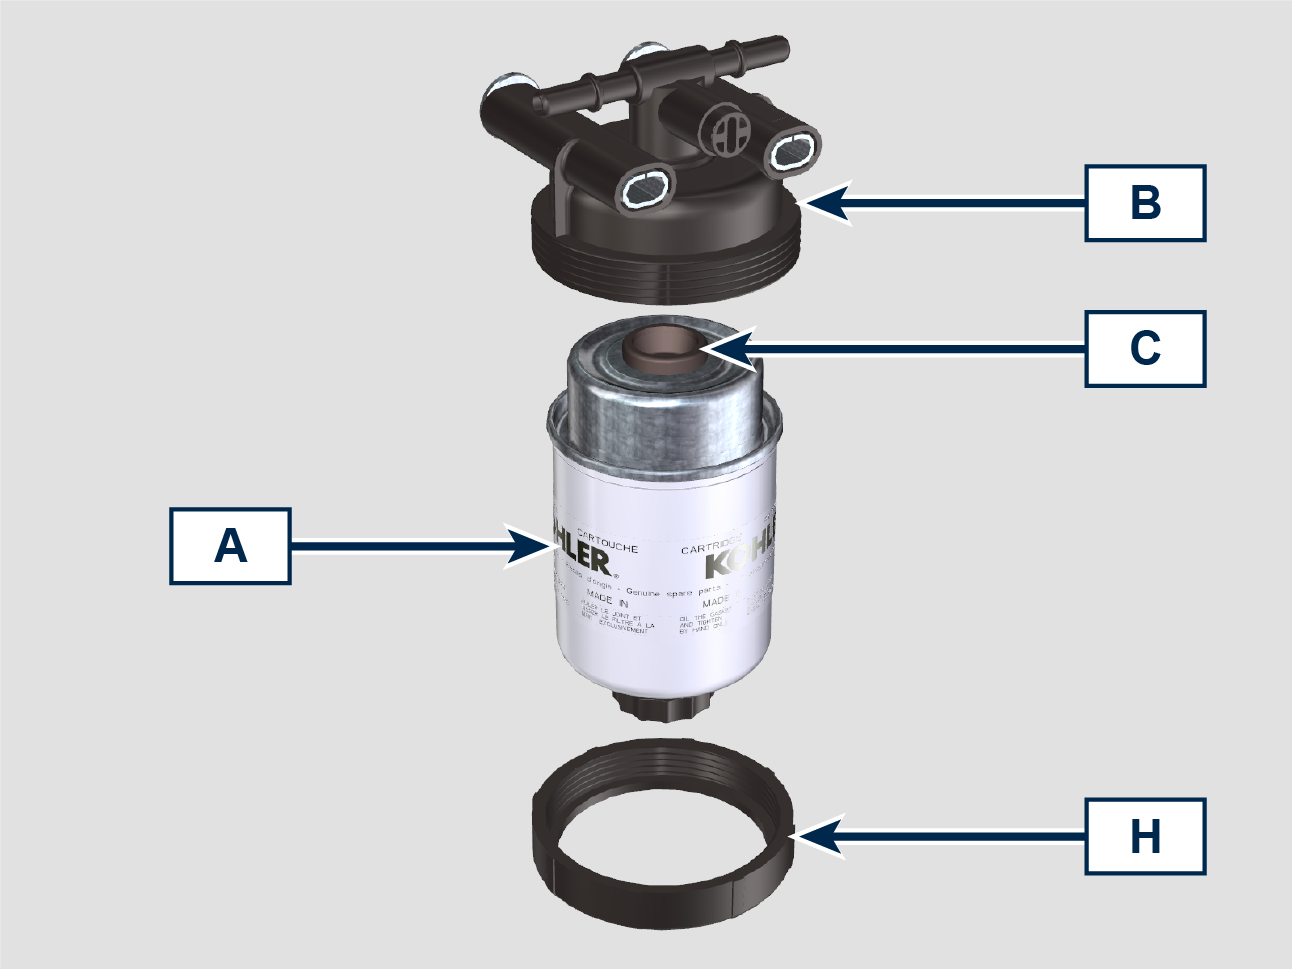
Fig 6.8b
|
- Turn the key on the control panel to the ON position.
The electric pump D sends fuel to the filter B and then the injection pump G.
- Loosen the air bleeding screw F on fuel filter bracket B and the screw E on the injection pump G.
The air inside the circuit and the filter will begin to escape from the screw F and E.
- Tighten the bleeding screw F and E (tightening torque of 1.5 Nm) when the fuel begins to flow.
|
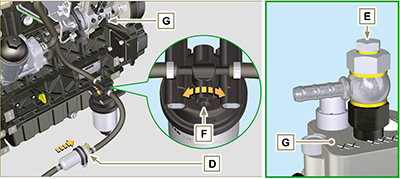
Fig 6.9 |


 Loading