
=
Search


Zinc anode and radiator check
 Important Important
|
|
|
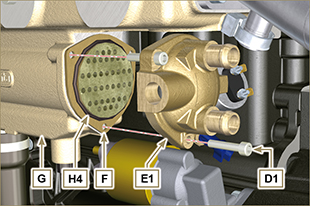
Fig. 5.7 |
 Danger
 Warning
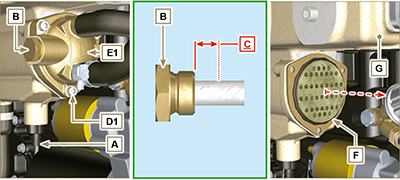
|
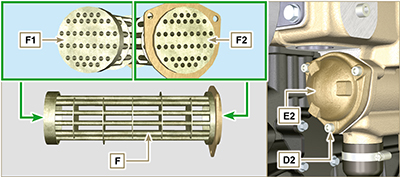
NOTE: if the inside of the pipes on surfaces F1 and F2 (Fig. 5.7) are clogged with deposits even after having been cleaned as per step 6, the pipes must be cleaned using specific mechanical tools.
|
Fig. 5.8
Fig. 5.9 |
|
Fig. 5.10 |
Fig. 5.11 |

 Loading